4.4
Press and fit game

level
skills
time
1 hours, 15 min
machines
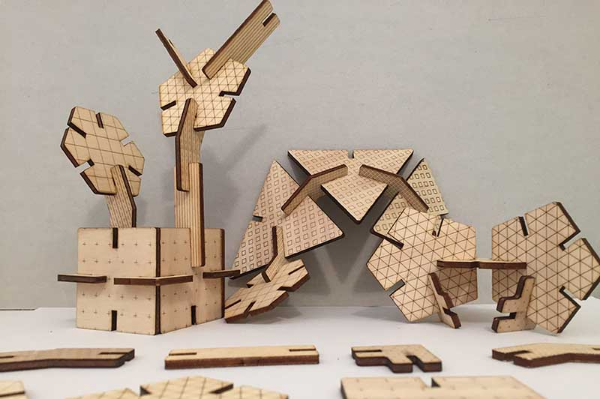
This Tutorial is finalized to realize a press and fit game.
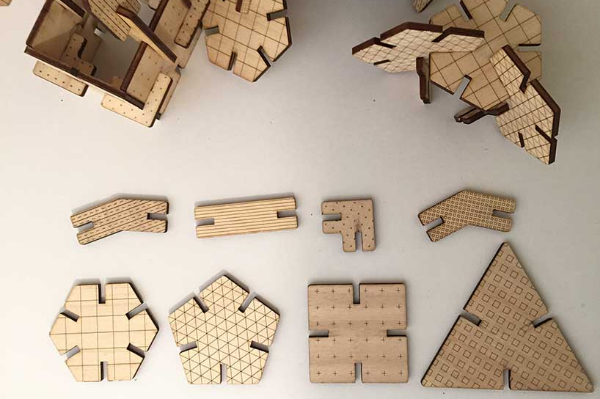
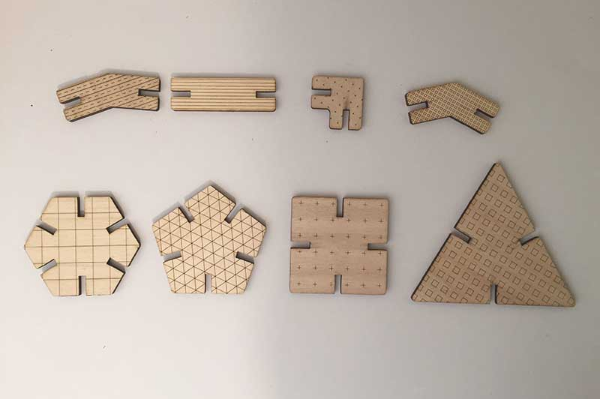
The idea is to have a sort of 3D construction game made using lasercutter. Through this game you learn how to handle the joints using this technology, you need to learn how to turn the 2d design you like into something that the machine can cut or engrave. This game it’s useful to draw the puzzle pieces in a parametric way: in this manner you will be able to obtain many different shapes with a single model. But if you want you can also draw without using parameters. This game consists of two parts: -PART 1: a series of geometric pieces (changing the parameter of the number of sides changes the geometric shape) -PART 2: joint (by changing the angle value, different joints are obtained).
What I need to build it?
To build this object you need a sheet of material that is good to be lasered, the minimum dimensions are 40x20 cm, you can use a 3 mm thick plywood
Step 1 3d Model of PART 1
Time: 10 mins
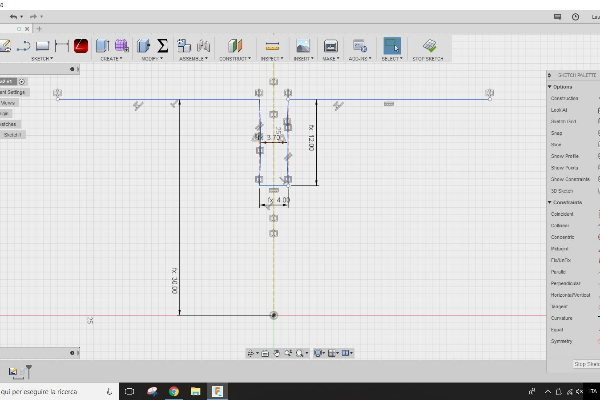
You can start with modelling the first piece yit 2D or 3D software. You can start with modeling the first piece with 2D or 3D software. If you’ve never used it you can try Fusion, it’s free and very intuitive. See the “2D and 3D modeling” section of the tutorials to learn more!
Step 2 Check the real dimention
Time: 5 mins
Pay attention to the dimensions with which you have modeled. For the lasercutter machine it’s important to draw in 1:1 scale, the joints will not otherwise have the right size.
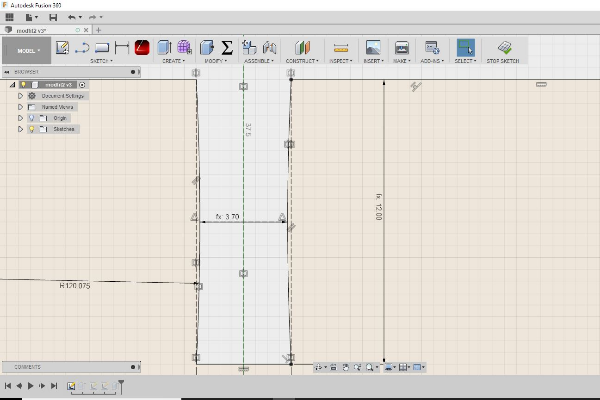
Step 3 Try parametric design
Time: 15 mins
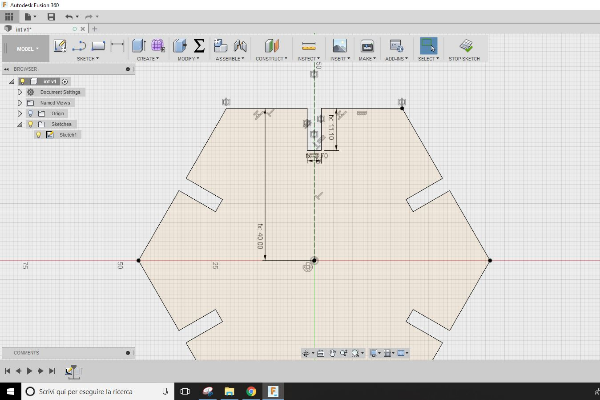
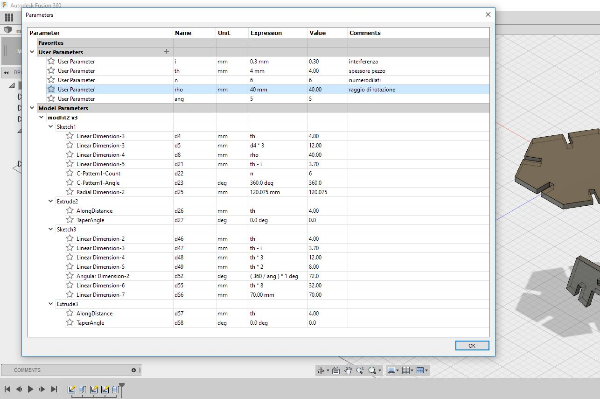
You can start modeling the joint in order to constrain and parameterize the parts of the piece based on the thickness. Designed in this way you are able to draw pieces of 3, 4, 5, 6 and even 12 faces without losing the functionality of the joint. How to do? Follow the screeenshot parameter or open model in Fusion 360 and try to reproduce the same parameters in your sketch.
Step 4 Details of the joint
Time: 10 mins
Make a cutting test to understand what is the interference of your lasercutter: so you can consider it in the maximum dimensions and reduce the internal size of the joint. If you do not do this, your interlocking will probably be too large and it will fall off.
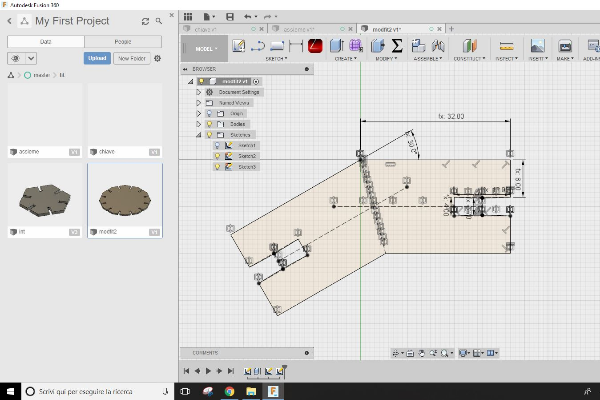
Step 5 3d Model of PART 2
Time: 10 mins
Follow the same considerations made for the first pieces, also for the second piece (pieces of junction) choose the shape you prefer and try to draw different angle, drawing and cutting different shapes is useful for building very different objects.
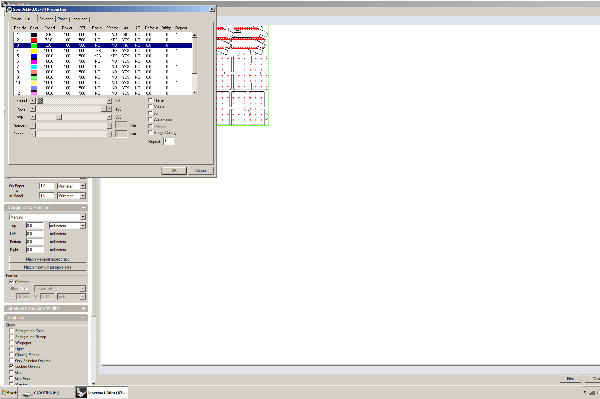
Step 6 Nesting and laser setting
Time: 10 mins
Once you have finished all the pieces you can copy all the parts you want to cut. Place them close to each other to avoid wasting material (this is called nesting). Now based on the tests you did previously, you can set the speed and power values for the different levels. After performing all the other steps, focus the lens and cut.
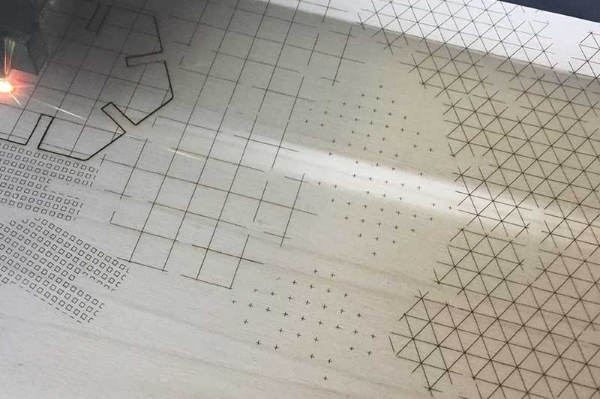
Step 7
Time: 5 mins
Lasercut machine is very fast, in a few minutes the processing will be completed, you can then extract the pieces and try to assemble them.
Step 8 final step
Time: 5 mins
**SELF ASSIGNEMENT LIST **
- I understood how to draw for the lasercutter?
- I have characterized my lasercutter?
- I understand what settings to use plywood incisions?
- I understand what settings to use for cutting 3 mm thick plywood?
** WHAT IF…**
- I changed thickness?
- I used cardboard or plexiglass?
- I did vector engravings?
- I changed the focus of the laser
Step 9 Document your project!
Time: 5 mins
The documentation with this tool is very simple, it can be useful to have specific tutorials for your machine.
Contributors
Laura Cipriani